!±8± Dap 00688 Household Waterproof Adhesive Sealant, 100% Silicone, 2.8-Ounce Tube
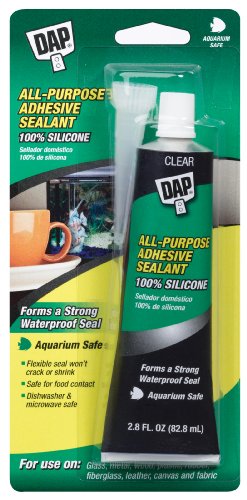
Dap 00688 2.8 fl oz; clear [PRICE is per TUBE]
Dap 00688 2.8 fl oz; clear [PRICE is per TUBE]

Dap 08640 10.1 fl oz; white [PRICE is per TUBE]
Lowest Price Cargo Rooftop Carriers Coupon Estrogen Creme Discounted 4g Phone

 | Price : $9.79
Sashco Sealants 13010 Lexel Adhesive Caulk 10.5oz, Clear Lexel is a co-polymer rubber-based sealant. It has excellent adhesion to a wide variety of materials, even after seven days of water immersion. Although it's tougher and resists tearing, Lexel is a soft rubber. This allows it to stretch and compress with joint movement. Lexel should not be used in areas of continuous submersion (i.e., aquariums or swimming pools). Do not use Lexel in areas where temperatures exceed 200 Degrees F. Lexel may damage some plastics, such as polystyrene foam insulation. Plastics not listed should be tested for Lexel compatibility before general application. Sashco Sealants 13010 Lexel Adhesive Caulk 10.5oz, Clear Features: Firmly binds to almost any surface, wood, metal, brick, concrete, tile, glass and even plastic Paintable and mildew resistant Non California compliant 10.5 oz Clear
Cheaper Vacum Cleaners For Sale Lg 1080p Tv Bargain Sale Cook Top Electric
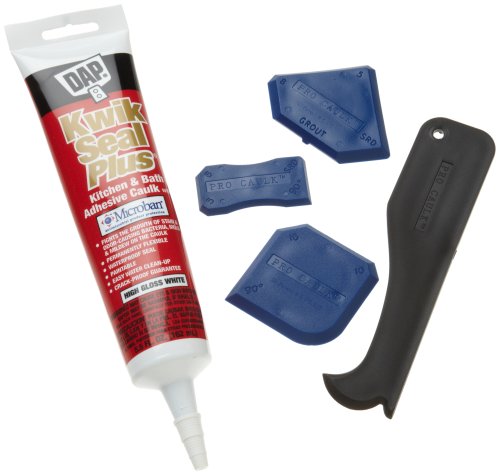
The Complete Caulking Kit
The Pro Caulk edge kit is the easy way to finish your bathroom, kitchen and home sealing projects. Applying caulk and sealants used to be messy and time consuming, but now you can seal like a pro in minutes. Just apply the caulk, silicone or grout, select a sealing edge and slide along for a perfect finish. Plus, there's no waste, just reapply the excess to extend the seal with no seam. The Dap Kwik Seal Plus kitchen and bath adhesive caulk with Microban fights the growth of stain and odor causing bacteria, mold and mildew on the caulk. It is flexible, water-proof and paintable. Pro Caulk is quick and easy to use, saving you time, money, and effort. Don't pay a professional when you can do a professional job yourself. For any edge, any corner, any joint, your solution is Pro Caulk.
 |
For A Perfect Finish

What's In the Box
Saving Farpoint Fp-100 Far-sight Binocular Bracket For Celestron Skyscout With Sk...
 | Price : | Post Date : Feb 19, 2012 17:38:04
Provides a water-tight seal around sinks, tubs and other kitchen and bathroom fixtures. Contains mildewcide to fight unsightly mold and mildew growth. Can be used for installing backsplashes and repairing loose tiles. Flexible. Extrudes approximately 16.9ft. when using a 1/4" bead.
 | Price : $2.71
Vinyl caulking with adhesion stronger than many glues. Bonds to all common building materials. Use to caulk around tubs, showers, tiles, windows, and sinks. Use both indoors or outdoors. Stays flexible in hot or cold weather. Paintable. No. 00101: White,
The Cheapest Canon Power Shot G2 3m Fire Sealant Ideas Laptop Adapter Order
A quick and relatively inexpensive way to freshen the look of your bathroom is to replace the vanity. With a little planning, it can be finished in a day.
First and foremost, measure the space available and note them down. Measure your old vanity too, so that you could use it as a guide when trying to visualise how much bigger or smaller your new vanity will look.
After buying your new vanity, prepare the necessary tools required. Basically, they are adjustable wrenches, pry bar, utility knife, power drill, caulking gun, slip joint pliers, measuring tape, carpenter's level drywall screws, shims, hole saws and stud finder. If unsure or lacking any tools, visit your nearest hardware store and they can advise you. For personal safety, be equipped with safety goggles and face masks. Now, it is time to remove the old vanity.
Firstly, cut water supply by turning off the shut off valves for both cold and hot water supply. With an adjustable wrench, disconnect all supply tubes from the faucet bases. Next, place a pail below the sink trap and use a pair of adjustable pliers to remove the trap.
Secondly, remove the cabinet doors and drawers. Using a screwdriver or socket wrench, remove all the screws that were holding the vanity to the wall. They are usually in the corners or in a rail across the back of the vanity. To remove the top from the base, remove the screws or use a pry bar. Next, remove the basin and gently lift it out. This makes it easier to remove and handle the vanity top. Using a pry bar, remove the backsplash from the wall carefully. Now that the old vanity is out, inspect the area for any damages or rots and repair them before installing the new vanity.
To install the new vanity, locate the studs in the wall and make location marks on the wall. Decide where to position your new vanity and mark its position on the wall. Next, carefully measure the locations of the water pipes and drain lines and mark these pipe locations to the back of the vanity. Use a hole saw at least ½ inch larger than your pipe, and drill holes for the water lines.
Lay old blankets or rags on the floor to minimise floor damage. With someone's help, lift up the vanity into place and drill pilot holes in the back for mounting screws, making sure that the holes are aligned with the wall studs.
If your vanity has a built-in basin, install the faucets first by putting them into the pre-cut holes and then tighten them with a wrench. Attach the water supply lines to the faucets and the tail pipe to the sink drain. Finally, run a bead of adhesive caulk along all top edges of vanity cabinet and place the top on the vanity, making sure it is level and tightly against the wall.
However, if your sink is separate from the vanity top, install the countertop first, then the faucets and then put the sink into the countertop.
Finally, attach all the water supply lines to the supply valves and the sink trap to the drain lines. Run some caulk around the bases of the faucets and the seams where the edges of the backsplash meet the wall. Turn on the water and check for any leaks and you are done!
Ge Electric Range Top Quality Bargain Sale Nikon D40 Washers Lg Online


